Sheet Mulching Instructions
Adapted from “9 Easy Steps to Sheet Mulching” by Eric Toensmeier, April 18, 2014.
Adapted from “9 Easy Steps to Sheet Mulching” by Eric Toensmeier, April 18, 2014.
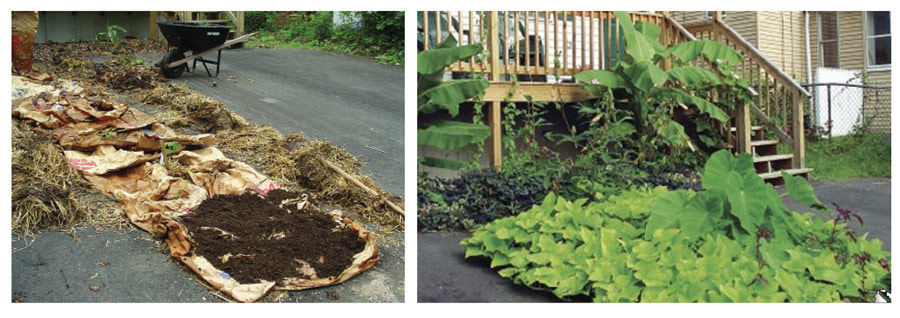
Sheet mulching is an easy, no-till way to transform lawn or unwanted vegetation into a garden bed. This technique, also known as lasagna gardening, can build remarkable soil in just a few years. As the materials break down, earthworms move in and create a healthy, aerated planting bed. Sheet mulching combines soil improvement, weed removal, and long-term mulching in one fell swoop.
You can use sheet mulching to turn lawns or weedy waste areas into gardens in just a few hours, or even to build soil from scratch inside built frames for raised beds. Sheet mulch can range from just a few inches thick to two feet or more, depending on the quality of your soil and how much raw material you have available (it will settle quite a bit). A sheet-mulched bed can be created any month of the year when the ground is not covered with snow.
Ten Simple Steps to Sheet Mulching
- Mow or cut your lawn, weeds, or other vegetation right down to the ground.
- Plant any crops that will require a large planting hole (including woody plants, perennials in large pots, and large transplants).
- Add soil amendments as determined by a soil test.
- Water the whole area thoroughly to help get the decomposition process going.
- If you are adding compostables that may contain weed seeds (such as fresh manure, leaves, or hay), spread these materials on the ground. (Put a dry, carbonaceous layer of hay or shredded leaves below any manure layer.) Avoid thick layers, and make sure to get a good carbon-to-nitrogen ratio just as if you were building a compost pile. Soak this layer.
- Lay down a weed barrier. Large sheets of cardboard from appliance stores work well because these are long-lasting and easy to lay down. You can also use six-sheet-thick layers of wet newspaper or yard bags. Make sure to have a four- to six- inch overlap so buried weeds can't find a route to the surface. If you have already planted crops or have other pre-existing plants, cutholes in the cardboard to make some breathing space for each plant (or leave some room around each plant if you are using newspaper as your barrier layer).
- Water thoroughly.
- Add seed-free organic matter. High quality compost is ideal, but alternating layers of nitrogen-rich materials like fresh grass clippings with carbonaceous materials such as weed-free straw will decompose to create a compost layer.
- Now add the final top mulch layer, at least three inches thick. Straw, shredded leaves, and pine needles (pine straw) are good multi-purpose mulches, but wood chips should only be used to cover a bed for plantings of woody perennials.
- Soak the whole bed thoroughly once again. The sheet mulch bed is complete.
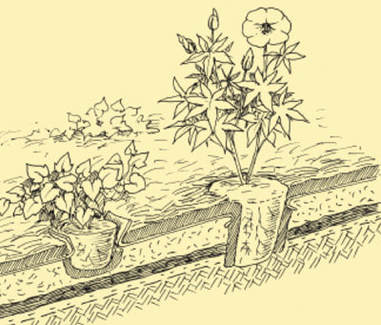
You can plant right into your bed immediately if you like. To plant tubers or potted plants, just pull back the top layers until you get to the weed barrier. Then cut an X in the cardboard or newspaper and peel back the corners of the X if you are transplanting a large plant, Throw a double handful of compost in the planting hole and then put in the plant. Pull the layers and top mulch back around the plant, water well, and you're all set.
Planting seeds is easy, too. Just pull back the top mulch to the compost layer and plant your seeds. You may want to cut through the weed barrier below first, depending on weed pressure below the barrier. If you are planting seeds, be sure to water regularly, as compost on top of cardboard can dry out quickly.


